
With 4 cores, 8 logical CPUs and up to 64 GB of ram the 8th generation i5 and i7 Intel NUCs make nice little home lab virtualization hosts. This week I rebuilt one of mine and documented the build process.
Hardware:

In terms of components, there is not much to it. The NUC includes everything except ram and storage on the motherboard. The components I chose for this build are listed below.
- NUC8i5BEH
- 64GB (2x32GB) SoDIMM (M471A4G43MB1)
- A 32GB USB stick for the ESXi boot disk
- Local Storage: (optional)
- Samsung 970 PRO NVME M.2 drive, 512GB
- Samsung 960 EVO SSD drive, 1TB
Everything is easily accessible for installation. Loosen 4 screws to remove the bottom cover and everything can be assembled in minutes.

Bios settings:
Next boot into the BIOS and update it if needed. The BIOS hotkey is F2. If the NUC doesn’t detect a monitor at boot the video out may not work, so plug in and turn on the monitor before powering up the NUC. I have already updated the BIOS on this one, but it is easy to do. Just put the bios file on a USB stick and install it from the Visual BIOS.
There are a few BIOS settings that should be adjusted to make things go smoothly. First, to reliably boot ESXi from the USB stick, both UEFI boot and Legacy Boot should be enabled.

Next, on the boot configuration tab, enable “Boot USB devices first”:

Next head over to the Security tab and uncheck “Intel Platform Trust Technology”. The NUC doesn’t have a TPM chip, so if you don’t disable this you’ll get a persistent warning in vCenter: ” TPM 2.0 device detected but a connection cannot be established. “

On the Power tab you’ll find the setting that controls what happens after a power failure. By default it will stay powered off. For lab hosts I set it to ‘last state’, for appliance hosts like my pfSense firewall, I set it to always power on.

ESXi Installation:
ESXi 6.7U1 works out of the box, with no special vibs or image customization required. There is really nothing unique to see here so I’ll skip on to configuration.
ESXi Configuration:
Once ESX is up and running you can see the 64GB ram kit is working despite the 32GB limit in Intel’s documentation.

Because I have internal storage, I create a datastore ‘datastore1’ on the NVME drive. I’m saving the SATA SSD for a later project so I am leaving it alone for now.
Next there are a few settings in ESXi that are worth pointing out. First, set the swap location to a datastore. This avoids some situations where a patch may fail to install due to lack of swap.

Similarly the logs should be moved to a persistent location, here I’ll put them on datastore1. These settings are found in the “Advanced settings” on the system tab shown above. Note that I had to pre-create the directory structure on datastore1 before applying this setting.

The next few settings are less conventional, and not recommended for production, but make life easier in the lab. I’ll explain my reasoning for each and you can decide for yourself how you like your systems configured.
First up is salting. Salting is used to deliberately break transparent page sharing (TPS) in an effort to improve the default security posture of the host. But this isn’t production, it’s a home lab. I fully expect to over-commit memory on this little host, so if I can gain any efficiency by re-enabling transparent page sharing and letting it de-dupe the ram across VMs, I’ll take it.

Next is the BlueScreenTmeout. By default if an ESXi host panics (a PSOD), it will sit on the panic screen forever so you can diagnose the error and so the host doesn’t go back into service until you’ve had a chance to address the problem. But for these little NUCs I run them headless, and they don’t have IPMI or even vPro. I would have to plug in a monitor and reboot it anyway to get at the console, so I would rather it just reboot so I can access it over the network. On this setting 0=never reboot, >0=seconds to wait before reboot. I’m going with 30 seconds:

And finally I will enable SSH and disable the resulting shell warning. I frequently connect to my lab hosts over SSH, so I prefer to leave SSH enabled. Again, this isn’t something you would do in production. It is purely a lab convenience.
For both of the TSM services, I set the policy to “Start and Stop with Host”, then start the service.

The UI will continue to warn that these services are running. This setting disables that warning:

Networking Options:
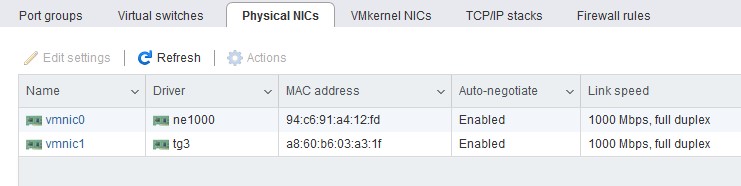
The built-in 1gb network adapter may not be enough for every lab scenario, but network connectivity is not limited to the single onboard gigabit NIC. The Apple Thunderbolt adapter and Apple Thunderbolt NIC are fully functional:
Or you can install the USB Network driver fling, and add some USB 3 gigabit nics, with some caveats around jumbo frame support and a few other things you can read about while you download the driver.
Here’s a screenshot from a NUC I was testing with 4x1gb connectivity provided by 2 USB3 adapters, the Apple dongles, and the onboard NIC.

10GB is also option, with a working Thunderbolt3 adapter and driver. William Lam over virtuallyghetto.com has been testing some of the 10GB options.
Conclusion:
The current generation of NUCs are surprisingly capable and configurable little ESXi lab hosts. This is how I build mine, but if you’ve got other ideas share them in the comments.

This is a great post!! I guess it’s time to upgrade the NUC farm and create a NEW home lab management cluster!!
LikeLike
Awesome!
LikeLike
Great post! About NUC not detecting monitor and hence no video out, we can get one of those HDMI dummy plug to emulate a monitor. That will allow us to plug in a monitor when necessary.
LikeLike
Thanks! I had thought those dummy adapters would solve the problem, but never actually picked on up to confirm it.
LikeLike
Believe they do. Anyway, I ordered one from Aliexpress for less than US$2. Will test it on my NUC8i7BEH and update on the results.
LikeLike
Happy to report that the dummy plug work!
LikeLike
Excellent. Thanks for letting me know!
LikeLike
How did you succeed in getting the network adapter recognized? I have this exact NUC and the esxi 6.7 installer bombs out with “No Network Adapters.” I did install 6.7 on the gen-7 NUC, but this one is giving me fits.
LikeLike
I’ve not had to do anything special. Which version of the 6.7 iso are you using?
LikeLike
I have been meaning to create about something similar to this on a single of my blogs and this provided a concept. Thanks.
LikeLike
Did you try install on this appliance some Ubuntu/Centos qemu/kvm daemon for virtualization?
LikeLike
I have run KVM on Centos on an identical build.
LikeLike
Thanks for this article! I have one question if someone can help. I would like to build an ESXi on NUC8i5BEH at home. And I need 32GB of RAM in this NUC. Is there a difference in performances between 2x16GB SODIMM and 1x32GB SODIMM ? Maybe 2x16GB is more powerful as the load is balanced between 2 cards ? If no difference, I’ll take 1x32GB as it let the possibility to add more RAM in future in the second slot. Thanks in advance for the help.
LikeLike
[…] Running ESXi 6.7 on a Bean Canyon Intel NUC NUC8i5BEH. […]
LikeLike